Building the Hardrock 50 HF Power Amplifier for QRP Rigs
I love my Elecraft KX3 but as I learned on a mini-DXpedition to St. Martin this summer sometimes 10 or even 15 watts is not enough power to make a decent QSO rate, even with a resonant antenna. I know I could buy a 100w rig for travel, but I’d like to keep the KX3 and get more use out of it. The KX3 travels nicely, and the antennas, cables and batteries all pack down into a backpack that's convenient for air travel.
There are several HF power amplifiers on the market designed for portable QRP radios, including the Elecraft KXPA100, the RM ITALY MLA100 and Chinese made MX-P50M which is currently “Amazon's Choice” for what that’s worth.
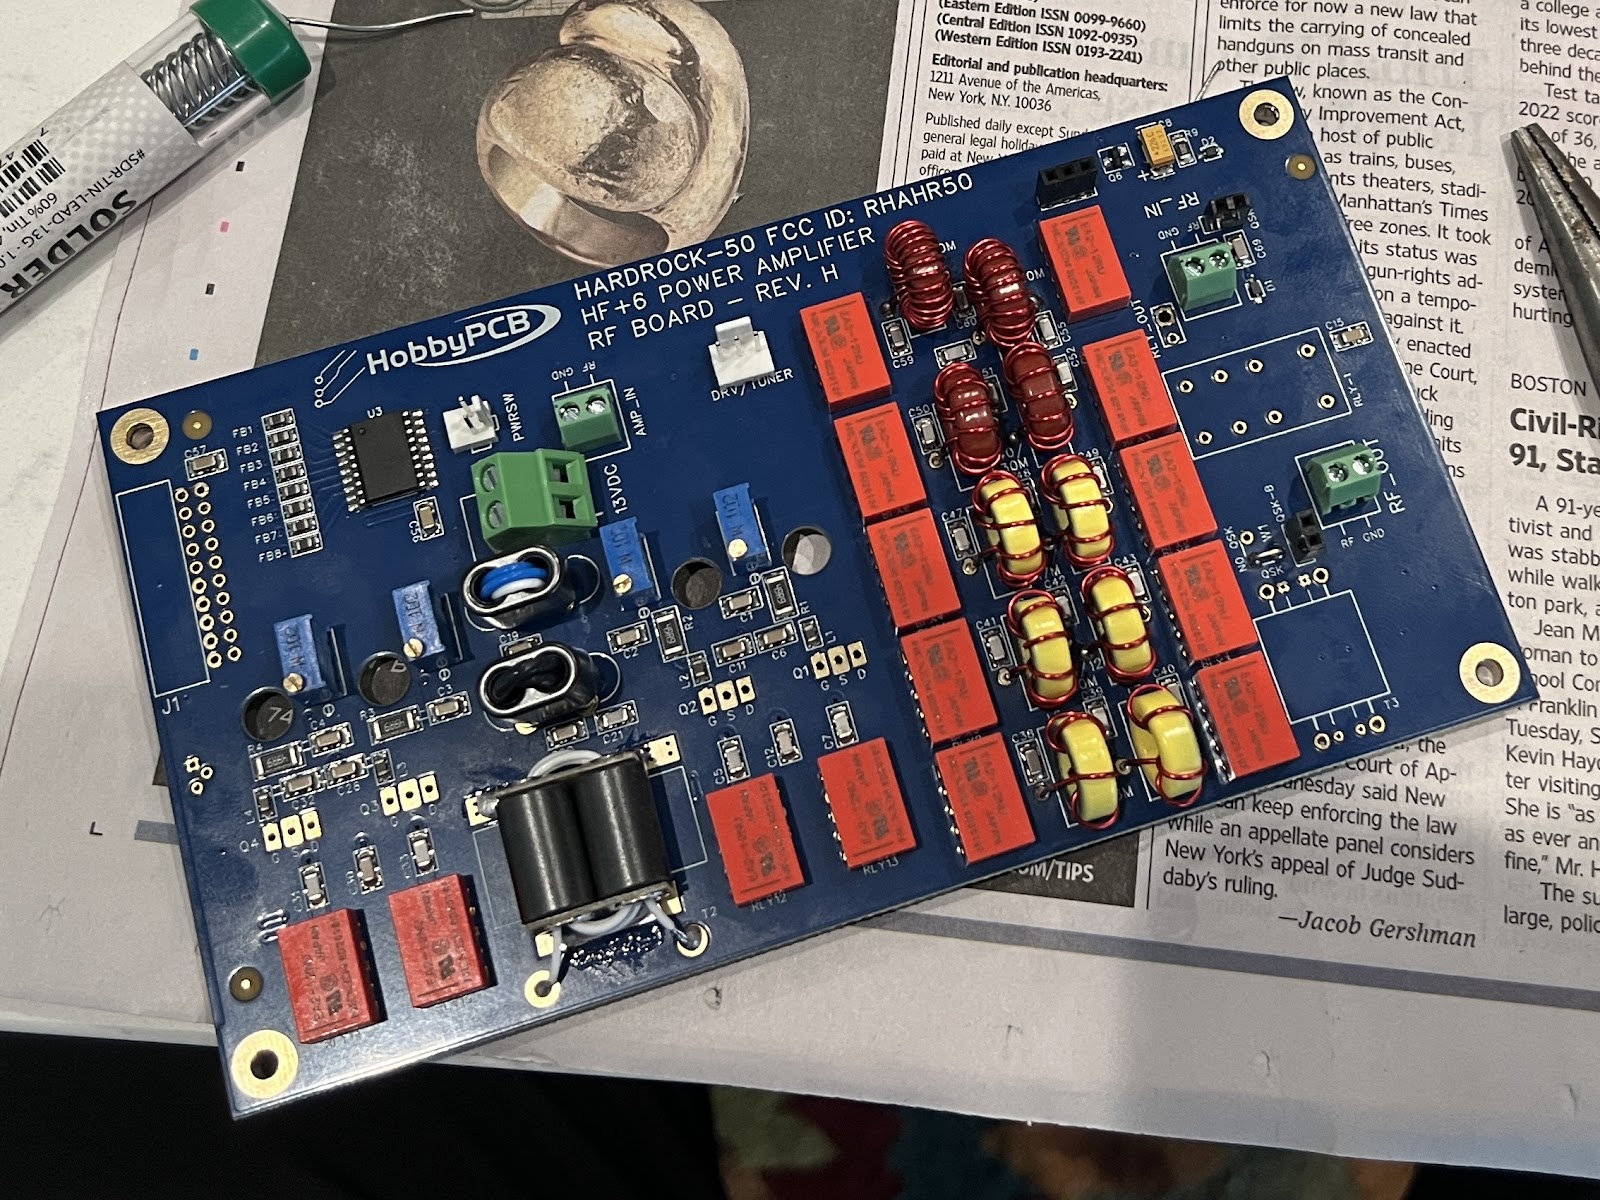
After some research I settled on the Hardrock 50 which is a complete amplifier kit that is FCC approved for commercial sale by HobbyPCB.com. The amplifier is based on Jim Veatch's award winning design developed for the ARRL's 2nd Homebrew Challenge competition. The Hardrock 50 covers 160M - 10M bands and supports auto band switching with an optional rig interface.
The kit I received has serial number 3194, with rev H circuit boards. I added the $30 QSK Mezzanine Board option because I prefer silent pin-diode T/R operation when working CW. I also added the KX3 rig interface to enable automatic band switching in the amp. HobbyPCB sells other kits and accessories including an internal tuner which can be added later if needed.
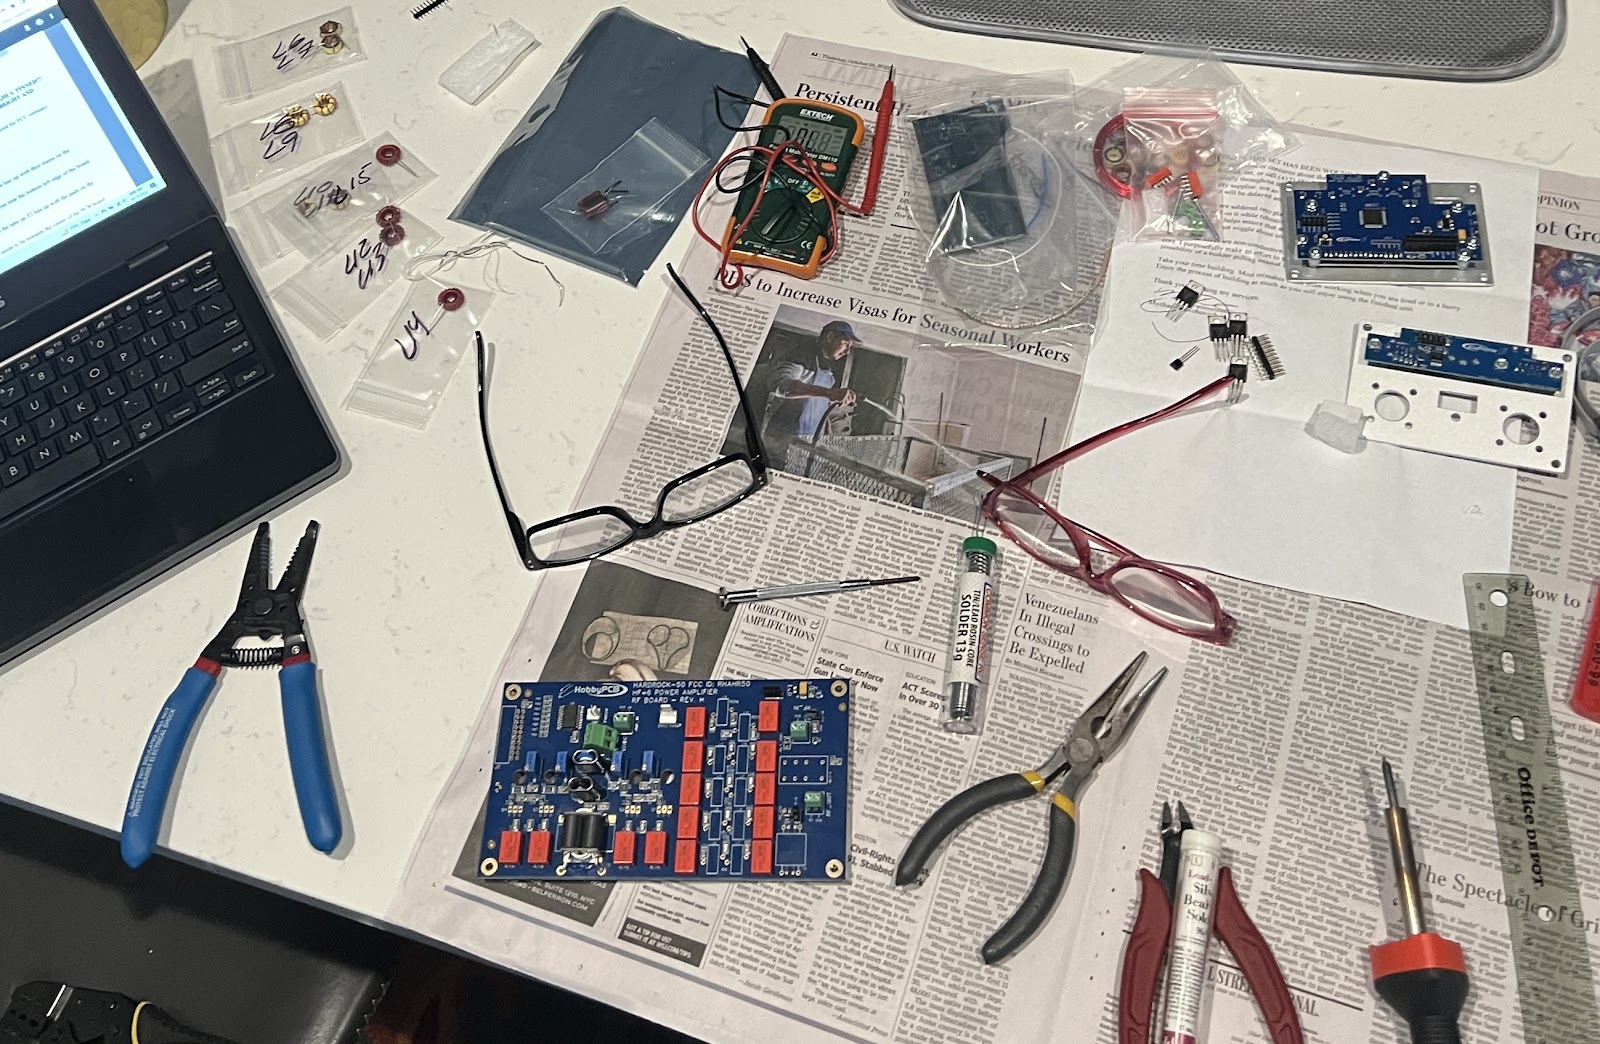
I completed the build over a Saturday afternoon and Sunday morning. I saved a considerable amount of time by using pre-wound toroid kits which are sold separately by the Toroid Guy. Even with the prewound kits there was still plenty of soldering, transformer winding and mechanical assembly required to complete this project.
The kit was organized very nicely, with the components packed into dedicated bags of parts for each section of the build instructions available online at the Builders Portal. The instructions follow a methodical step by step process, section by section, with plenty of pictures. The final checkout and alignment process is documented celery and was easy to complete Sunday night.
After the kit was fully assembled, I used a mutli-meter to retest my solder joints, and “fixed” a few connections that weren’t pretty enough. The alignment process itself was interesting. The amplifier uses 4 MOSFET transistors, with bias voltage and current controlled by four potentiometers VR1 - VR4. Once the DC bias is set to 0, you adjust VR1 - VR4 to get 150mA, 300mA, 450mA and 600mA of current on the gate of each MOSFET. The contrast on the LCD screen must also be adjusted by pot R111 on the control board.
The final step before testing the amplifier was to update the firmware. I upgraded to v4.1A which has a few nice features, like programming your call sign on the power up splash screen.
The KX3 requires two TRS cables for the interface to the amp. One for PTT and the other to send band data to the amp. I tested all bands with the amp transmitting into a dummy load. The amp only needed between 2 - 3 W drive power from the KX3 to generate 50W power, with some bands requiring a little more and others a little drive power.
I had a lot of fun building the kit, and went slow enough to avoid any major mistakes. The final checkout and test process was flawless. But there are a few things I learned during this build.
Bifocal readers would be a great invention. See pictures below. I may have lost some time looking for misplaced readers - my own 1x magnification for the instructions, and the XLYs 2x magnification for the soldering work. You walk away, you come back and the readers you need are suddenly gone. She says bifocal readers have already been invented but honestly I’m still getting used to the fact that I need readers now in the first place.
Take time to enjoy the build stage of the project. Better to do a job right, and be proud of your work (even if no one can see or appreciate it). I woke up Sunday morning and rushed down to my workbench, just because I couldn’t wait to make a little more progress.
Use the right tools for the job. I’ve ruined projects in the past by using a high powered soldering gun when a lower power soldering iron would have been just fine. And mistakes happen, so when you see things like solder suckers, or a nice set of wire trimmers, get them, you’ll be glad to have them on hand when you need it! PCBHobby will send spare parts, and extra wire if needed. Luckily I did not.
Never stop learning. I built an AM receive-only radio kit over 30 years ago. The instructions then were not that great, and there was a lot of trial and error, but I remember having fun till I couldn’t get the thing to work without a lot of troubleshooting after the fact. But well written instructions are well worth reading. Great products should have great instructions. Too many hams like myself don’t like to read the manual. Either because many manuals are poorly written or more likely we just turn it on and see what happens! Reading the manual itself can be a nice investment in time, allowing you to fully understand and get the most out of the thing you’re about to operate.
Finally, power amplifiers are just fun to use. QRO, QRP, barefoot, each has a place in this hobby. Yes I know 50W might not make a big difference on the S-Meter, and amplifiers can be expensive, but kits like these fill the gap. And the extra power might make all the difference in making or losing that highly sought after contact!
Overall the amp is very solid, the component parts well organized, and the protection circuits are designed to make the amp virtually indestructible. I’m very pleased with the results!
73 Chris de WX7V


https://sites.google.com/site/hardrock50beta/hardrock-50-builders-information-site


Comments